LESSON 2- "The 3rd Place" Portfolio Cover, Photocopy Transfer- Gel Medium, Packing Tape, Magazine, and 100lb Paper
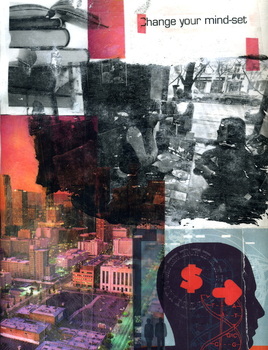
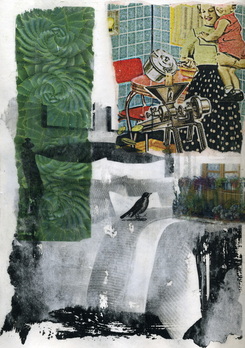
Project Examples: Karissa Ferrell, 2011
 |
|

Description:
With this lesson students will be introduced to printmaking techniques involving mechanically produced, “readymade” images. Students will thematically explore their “3rd Place” using images and text, as well as gel medium and packing tape transfer techniques. Their design will become their portfolio cover(s) which are used throughout the semester to store and turn in projects.
Objectives:
Artists' Examples of “the 1st, 2nd & 3rd Place”:
- Honore Daumier, Third Class Carriage
- Vincent Van Gogh, Bedroom at Arles
- Roman Forum & Ancient Roman Baths
- Degas, Race Track, Ballet/Dance Class, and Night Café` paintings
- Monet, Garden at Giverny series
- Visual Culture: Situational comedies (i.e. Central Perk-Friends, Moe’s-The Simpsons, Rehearsal Room-Glee, etc.)
Defining Terms:
Surface - What do you want to do the transfer on? Printmaking paper, un-stretched canvas, wood panel, cardboard, a wall or other smooth surface will work with the gel medium photocopy transfer techniques described.
Vehicle – The medium used to transfer an image from one surface to the other (gel medium or packing tape)
Monotype- A singular, non-reproducible print
Alter or Alteration -to make different in some particular way, to modify the size, style or course of something.
Intervention- to come between disputing people, groups, to mediate, to occur incidentally so as to modify or hinder, to interfere
with force or a threat of force. In art to intervene on a work is to add elements to the context of the work, changing the meaning,
or style of the original work.
Manipulation- to manage or influence skillfully, to adapt or change to suit one's purpose or advantage. In art to digitally manipulate an
image may be to distort, skew, stretch, flip, add filters, or resize an image for use in another context.
Materials and Preparations:
Materials for assembling the portfolio
Procedures: (estimated 9-10 days)
(DAY 1)
(DAY 2)
(DAY 3-7) *students should make at least one practice transfer in each technique before beginning work on their final design.
With this lesson students will be introduced to printmaking techniques involving mechanically produced, “readymade” images. Students will thematically explore their “3rd Place” using images and text, as well as gel medium and packing tape transfer techniques. Their design will become their portfolio cover(s) which are used throughout the semester to store and turn in projects.
Objectives:
- Students will discuss and understand the concept of a “3rd Place.”
- Students will create a design illustrating their unique “3rd Place” using both gel and packing tape photocopy transfer techniques.
- Students will construct a sturdy portfolio that they will use throughout the semester.
- Students will evaluate each other’s work; offering a “token response” to exceptional and outstanding projects. Students will also explain and support their selections.
Artists' Examples of “the 1st, 2nd & 3rd Place”:
- Honore Daumier, Third Class Carriage
- Vincent Van Gogh, Bedroom at Arles
- Roman Forum & Ancient Roman Baths
- Degas, Race Track, Ballet/Dance Class, and Night Café` paintings
- Monet, Garden at Giverny series
- Visual Culture: Situational comedies (i.e. Central Perk-Friends, Moe’s-The Simpsons, Rehearsal Room-Glee, etc.)
Defining Terms:
Surface - What do you want to do the transfer on? Printmaking paper, un-stretched canvas, wood panel, cardboard, a wall or other smooth surface will work with the gel medium photocopy transfer techniques described.
Vehicle – The medium used to transfer an image from one surface to the other (gel medium or packing tape)
Monotype- A singular, non-reproducible print
Alter or Alteration -to make different in some particular way, to modify the size, style or course of something.
Intervention- to come between disputing people, groups, to mediate, to occur incidentally so as to modify or hinder, to interfere
with force or a threat of force. In art to intervene on a work is to add elements to the context of the work, changing the meaning,
or style of the original work.
Manipulation- to manage or influence skillfully, to adapt or change to suit one's purpose or advantage. In art to digitally manipulate an
image may be to distort, skew, stretch, flip, add filters, or resize an image for use in another context.
Materials and Preparations:
- Gel medium
- Packing tape
- Baren- or hard & smooth object for burnishing
- Sand paper or Brillo scratch pad
- Scissors or X-acto knife
- Craft sponge brushes
- Newsprint or scratch paper to cover tables
- Magazines (somewhat related to “place”)
- Computer, Internet, and Laser/Toner Printer (optional: software for enlarging, flipping, and contrast manipulation)
- Photocopier or Scanner/Printer
- Thick cotton based paper
- Colored papers, tissue paper, pens or colored pencils for altering transfers
- Containers for water and gel medium
- Hairdryer to speed up drying time
- Dust pan and brush for clean up
Materials for assembling the portfolio
- Laminating machine
- Elmer’s glue to adhere the cover to the portfolio
- Chipboard board (cut to the dimensions of 11x20 inches- 2 per student)
- Duct tape (different colors for different levels)
- Sharpie Pens
- Staplers
- Rulers or yard sticks
Procedures: (estimated 9-10 days)
(DAY 1)
- Teacher will introduce students to the theme of “the 3rd Place.” Students will first brainstorm associations related to the 1st Place- HOME and the 2nd Place- Work/School. Then students will consider the hallmarks of “the 3rd Place.”
- Students will jot down their ideas and the hallmarks defined by Ray Oldenberg on the provided handout.
- With their table groups, students will generate a list of possible “3rd Places” for people their age. Each student will choose one “3rd Place” on which to focus for their portfolio cover. Level 2 and Advanced students will also create a back cover based on either Home or Work/School. (Examples may include: coffee shops, church, barbershop, bar/restaurant, park, mall/shopping venue music venue, skate park, basketball court or sports field, gym, facebook, internet games, the beach/pier, specific location on campus, etc. (For homework students can begin collecting images).
(DAY 2)
- Using the ELMO, the teacher will demonstrate both techniques for transferring photocopies and creating their collaged designs.
- Using the computer and digital projector, the teacher will also demonstrate basic image manipulation techniques in Photoshop or WORD. Students may want to enlarge or reduce and image, flip text, or increase the contrast of their images. Students should compile various images on the same page before printing on the laser black/white or color printer.
- Students will begin research by brainstorming images that would relate to their 3rd place. Students are encouraged to find images using their home computers (and print if they have a laser printer at home or save to a flash drive). Students will also use magazines provided by the teacher.
(DAY 3-7) *students should make at least one practice transfer in each technique before beginning work on their final design.
For gel medium transfers:
|
For packing tape transfers:
|
- After transfers are completed students can use experimental mixed media techniques to enhance their designs. It is advisable for student to practice a new technique on their practice prints before altering their final image. Mixed media techniques may include (but are not limited to) adding watercolor to Gel Medium and coating like a varnish, creating stencils and adding airbrush colors, adding found text from magazines, drawing on top of the transfers with sharpie or oil pastel.
- Students will turn in their final cover(s) to be laminated.
(DAY 7-8)
- How to assemble the portfolio: * Following the demonstration each student will assemble their portfolio and glue on the laminated cover(s).
- Fold each chip board 6 inches from the bottom and staple along each edge (to make a 6 inch deep pocket inside each cover).
- Roll out 30 inches of duct tape (sticky side up), place each cover (pocket side up) in the middle of the tape; making sure to align the corners and leave a 1/8 inch gap between covers.
- Fold the remaining lengths of tape to the inside, with 1-2 inches of overlap.
- Cover the outside raw edges of the portfolio with 15 inches of duct tape; cut the corners at a diagonal to avoid messy tape edges.
- Use a sharpie to label the portfolio with student’s name, and period on the bottom of each outside cover. Label the inside left cover with the word “Finals” (because with subsequent projects students will turn in their best prints for grading) and on the right “Practice and Process” (that is where the self-evaluations, worksheets and practice prints will be stored for grading.
- Students will trim the laminated cover(s) and glue them to the portfolio Elmer’s white glue.
(DAY 9)
Closure:
- Students will spend a few minutes filling out the self-evaluation form given to them at the beginning of the project and organizing their practice prints, which will get stapled to the packet of process work/handouts.
- Students will participate in a group assessment of the class’ work using a token system. Students will arrange their portfolios on the tables so that each cover is visible. Each table will have 4 tokens to award to various projects throughout the class. Groups will spend about 10-15 minutes walking around and deciding which project deserves which award. They will leave the small token with the project and fill out the worksheet reflecting on why they chose that work.
- Students will also reflect on their choices for the theme, difficulties they overcame and what they like best about their project. Projects that are awarded tokens will receive ½ point extra credit per token.
- The teacher can discuss the overall results of the project generally with the class or ask students to share specific reasons why their group selected a specific work.
Assessments:
- Formative Assessments: Teacher will monitor progress on idea gathering and practice photocopy techniques. Teacher will informally assess and discuss student’s understanding of “the 3rd Place” and discuss methods of visual communication, visual balance, connection of ideas and design techniques with each student.
- Summative Assessment: Students will grade themselves based on the self-assessment (40 points scale - 10 points each for meeting the criteria, good craftsmanship, effort & invlolvment, and creativity & origniality- taking it beyond the basics). The rubric was given at the start of the project. Teacher will grade the completed project based on the given criteria. Students will participate in peer token response activity.
Extensions:
Students can experiment with various other photocopy transfer techniques to create a second or third cover design. Materials may include: gesso transfer, ink jet prints on transparency, ink jet prints on paper, contact paper transfers, blender pen and or tea tree oil for transferring images. For a sketchbook assignment students could do an observational drawing of their “3rd Place,” and/or including themselves in the image.
Click below to download Lesson 2 design packet and assessment rubric
|
|
||||||||||||